Here's a basic step-by-step guide to get you started.
We have a video tutorial to learn the stitches slowly for beginners.
See just below.
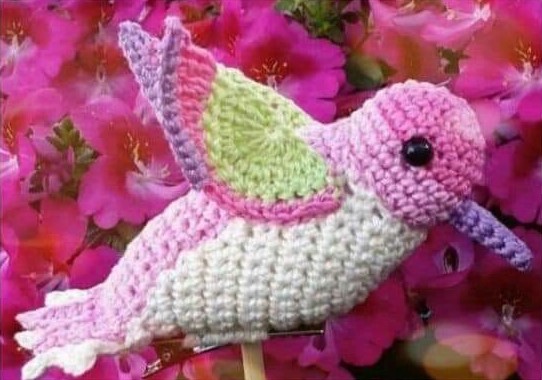
This Hummingbird - Amigurumi Crochet pattern is basic for beginners. A fun pattern for you and your family.
Amigurumi Crochet
Amigurumi is an ancient Japanese art that involves making crochet dolls. A very famous art that comes to meet with children. For many years, families have created crochet amigurumis as dolls for babies.
They put it in the baby's crib to calm down. This type of crochet amigurimi technique even works in maternity hospitals.
For our intermediate level crochet friends - crochet amigurumi.
It is really worth learning this technique for a job, one order you will realize that many mothers look for this type of job in maternity wards.
History of Amigurumi
A Japanese combination of the word ¨crochet¨ with ¨teddy bear¨.
Ami means crochet in Japanese. Nuigurumi means plush doll.
Interestingly enough, this technique has been successful all over the world.
And we're still talking about her today.
The amigurumis are made with crochet yarn.
A small crochet thread is used to make very tight stitches and the circle crochet technique is used.
This circle crochet technique is used to create the base of the bear or doll that will be made of the amigurumi.
Crochet amigurumi dolls can be made in various sizes and models of dolls being used in key chains and dolls for babies.
Gather the family and create your own crochet amigurumi.
Necessary materials:
Necessary materials:
Crochet threads in different hummingbird colors. Green example for the wings, pink for the body and white for some art. Purple line for the beak. This hummingbird image is beautiful.
Suitable crochet hook
Suitable crochet hook
Filling for synthetic fiber
Tapestry needle for sewing some pieces
Eyes are optional. For children do not put. They can be made with black crochet thread, it's safer.
Step 1: Body
Start with the green yarn for the body of the hummingbird.
Make a magic ring and work 6 single crochets inside the ring.
Increase in each single crochet. 12 Points in total.
Keep working the low points until it is the desired length.
Step 2: Wings
Choose the colors to make the hummingbird's wings.
Make a magic ring and work 6 single crochets inside the ring.
Make a few turns inside the circle and work 12 single crochets inside it.
Then start decreasing and make 2 single crochets together and make 6 stitches at the end.
Continue to the desired size.
Then make the second wing.
Step 3: Beak
Choose the color you want to make the hummingbird's beak.
Make the magic ring and work with 3 chains.
Connect the last stitch to the first with the slip stitch.
Form the circle.
Work a few turns in low point to form the beak of the hummingbird.
Step 4: Assembly
Fill the body with synthetic fiber padding.
Sew the wings according to the up position.
Sew the beak so that it is positioned horizontally. Avoid letting the spout hang down to maintain the aesthetics and beauty of the work.
For children, it is safer to embroider the eyes.
Your hummingbird amigurumi is ready! Enjoy and give personalized shapes to your work. A very simple family fun to make.
Final remarks:
I am delighted with every point we make!
We want to thank you for visiting us for the first time. Share your work with us. Have fun with the amigurumi hummingbird and see more works like a crochet blanket. Granny Square.
Crochet sunflower patterns. Crochet blouses. Crochet bags and more patterns you can learn.
To our friends who have been with us longer, thank you very much for the love and support you have with us. We are very happy to share these beautiful works with you.
Remember if I can do it, you can too.


